
Windows 10 was meant to accomplish almost everything for everyone, much like a Swiss Army Knife or so Microsoft hopes. It’s flexible to be a single operating system that can run on various devices, including PCs, tablets, and smartphones. Its design also helps to give PC users a more classic Windows experience than Windows 8, which Microsoft believes would win over long-time Windows users and many IT departments who opted out of Windows 8. This article will explore the fixes if your Windows 10 sleeps after 1 minute.
Finally, Windows 10 kicks off Microsoft’s Windows-as-a-service plan, which could spell the end of numbered Windows versions. Also, you can read this article if your computer restarts randomly.
See also: Top 8 Ways To Fix Windows 10 Unnecessary Processes
Table of Contents
Learn About Windows 10 Sleeps After 1 Minute
Some afflicted users have stated that their laptops go to sleep after 2 minutes of inactivity, while others have indicated that 3-4 minutes of inactivity triggers the problem. This appears to occur even if a user has set their computer to sleep after a long time, which is why this issue can be rather bothersome.

Although the issue is not limited to a single Windows OS version, given that Windows 10 is now used by most Windows home users, it’s not surprising that the vast majority of unexpected changes to safe mode instances are noticeable on Windows 10. A virus/malware infestation, which may have corrupted power settings, may cause the problem in some rare situations.
However, the Power Settings are usually what causes Windows 10 to go into sleep mode all of the time. It’s possible that you altered the settings by accident or that the change was caused by the recent installation of dubious software, such as a power saver, automatic system switch off, or anything similar. In this situation, think about whether you genuinely need that piece of software because it has the potential to alter power settings even if you adjust them manually.
See Also: We Couldn’t Complete The Updates Undoing Changes | Top 6 Ways
2 Ways To Fix The Error
Fortunately, this problem is very fixable, and the two ways that have proven to be the most effective in overcoming this problem are as follows:
Reset Power Settings
Custom power plan settings are usually at the root of the problem; if you have custom power settings and upgrade to a newer version of Windows, the latest Operating System may not be able to cope with and support your custom power settings, causing your computer to sleep after every 1-4 minutes of inactivity. In this case, you can rectify the problem by resetting and reconfiguring your power settings. To do so, you must first:
- Start by going to the Start Menu.

- Go to the Settings tab. Select System.

- In the left pane, go to Power & Sleep.

- On the right side, select Additional power settings.

- Select When you want to switch off the display, you can do so.
- By clicking on it, you can change advanced power settings.
- From the drop-down option, choose to Restore plan defaults. Plan defaults should be restored.
Once you’ve done that, you’ll need to reconfigure all of your power settings, including the one that controls how long your computer stays idle before going to sleep, and everything will work as it should.
See Also: Power Surge on USB Port Error In Windows 10 [Fixed]
Edit Registry
There are two steps to editing the registry.
Step 1
Many impacted customers have found that executing a registry update and adjusting custom power settings to ensure that your machine only goes to sleep after prolonged idleness has worked well. To do so, you must:
- To open a Run dialogue box, press the Windows logo key + R.

- In the Run dialogue, type regedit and hit Enter.
- Go to the following directory in the Registry Editor‘s left pane.
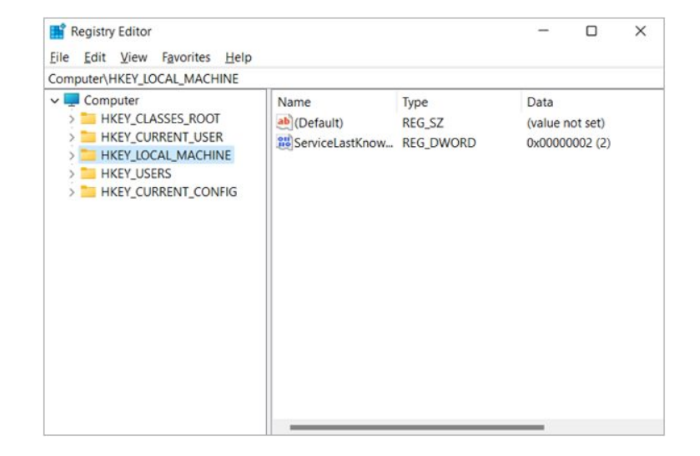
- To change a value titled Attributes, double-click it in the Registry Editor’s right pane.
- Replace everything in the Value data field of this value with 2. Click the OK button. Using the Esc key, exit the Registry Editor.
Step 2
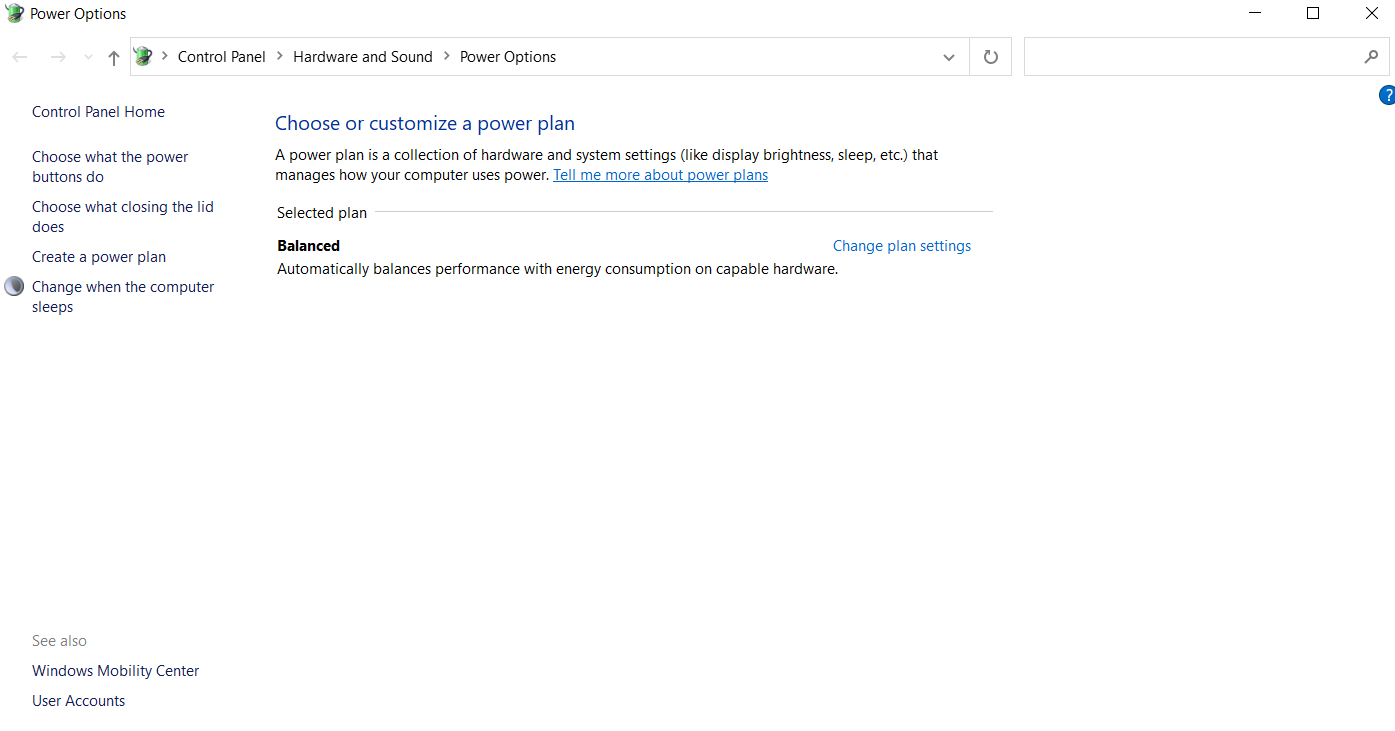
After applying the registry repair, you’ll need to increase the unattended sleep timeout on your system. Click here if your Windows 10 is very slow and unresponsive. To do so, you must first:
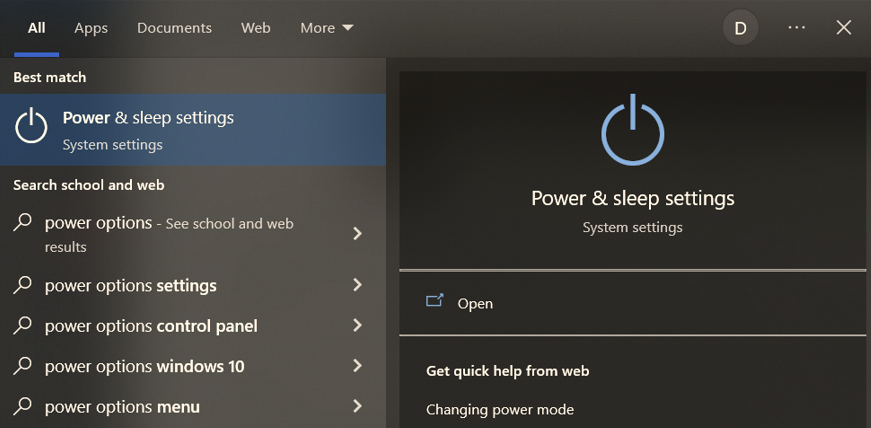
- Start by going to the Start Menu.
- Look up “power options” on the internet.
- Select Power Options from the search results.
- Change plan settings can be found under your chosen power plan.
- By clicking on it, you can change advanced power settings.
- By clicking on Change settings that are temporarily unavailable, you can access settings that are no longer accessible. Select Sleep.
- Select System unattended sleep timeout from the drop-down menu. This setting will most likely be set to 2 minutes; adjust it to something longer, such as 30 minutes.
- Also, select a longer time, such as 30 minutes, under “Hibernate After.”
- Timeout for unattended sleep in the system
- Apply and save your changes, then exit to see if the problem resolves.
Conclusion
If Windows 10 sleeps after 1 minute, it is very problematic. It hinders all the functioning and work that you have done on your device. It is a very traumatic situation if your Windows go to sleep abruptly. Hoping that this article has helped you to rectify the issue of Windows 10 sleeps after 1 minute.
See Also: Windows 10 Will Not Update with Error Code 0x80240fff

Joe Fedewa, a Staff Writer at Automaticable, with nearly a decade of tech journalism experience. Former News Editor at XDA Developers, passionate about technology and DIY projects. Wrote thousands of articles, tutorials, and reviews, starting with Windows Phone coverage.