Many people prefer using the mouse to navigate the computer and sometimes even a laptop instead of a touchpad. But several times, the users have witnessed a problem where the mouse pointer moves on its own without you moving or touching the mouse, creating a lot of problems, especially while typing. In this article, we will discuss ensuring the mouse moves automatically in Windows 10,11.

Click here, if your Windows 10 mouse lags and hinders your work.
See also: How To Fix r6025 Pure Vital Function Call Error
Table of Contents
Initial Fixes
Some of the initial workarounds are as follows:-
- Restart the computer:- try to restart your computer if you face this issue first. After rebooting, check your mouse and the cursor to see if it’s working fine.
- Plug on to another computer:-you can also try to plug the mouse onto the other computer. If the mouse still doesn’t work, then the mouse is faulty.
- Check the hardware:- Unplug the USB and plug it in again to make it work. Check if the USB is connected firmly. If it is still not working, click the mouse to the other USB ports available on the device. If it’s a wireless mouse, check its battery. Run some anti-virus software to prevent any malware.
- Check the mouse surface:- make sure to check the surface on which the mouse is resting. If the feeling is scratchy or uneven, or the mouse pad is worn out, then it may give wrong information to the mouse, causing disruptions in its movements.
- Disconnect other Devices:- this problem can be caused due to the devices connected to your laptop or PC like the graphics tablet, the joystick, or other input devices.
See Also: Digital output device (HDMI) missing on windows 10? Fix it
Other Methods So Mouse Moves Automatically
If the workarounds mentioned above don’t help, then try the following for mouse moves automatically:
Change The Touchpad Sensitivity
For changing the touchpad sensitivity in Windows 11, follow these steps. Open window setting. Then go to the devices. Click on Bluetooth & other devices, then select Touchpad and modify the touch sensitivity to the Low Sensitivity.
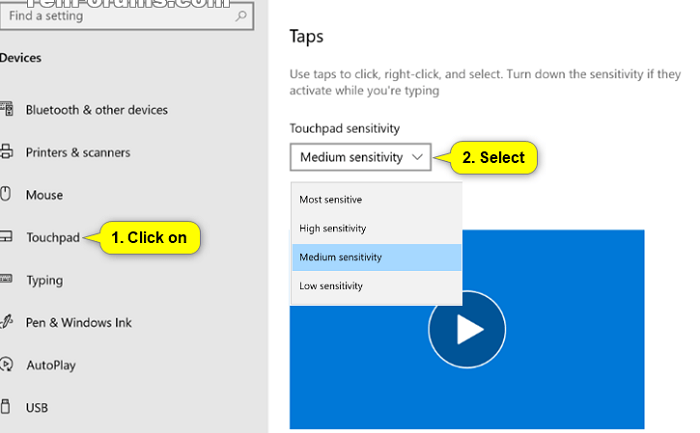
If it’s in Windows 10, go to the settings, click on the device, and then Touchpad. Modify the sensitivity to Low Sensitivity and see if it works.
Website: Microsoft
Don’t Hide Pointers While Typing
To do this, stick to the steps mentioned below:
- Start by opening the Control panel. You can also press key+R to open the Run window.
- In the run window, type “main.cpl” and click Enter.

- Click on the mouse pointer tab. Then “Uncheck Hide pointer while typing”.
- Finally, click “Apply” and then click on “OK”
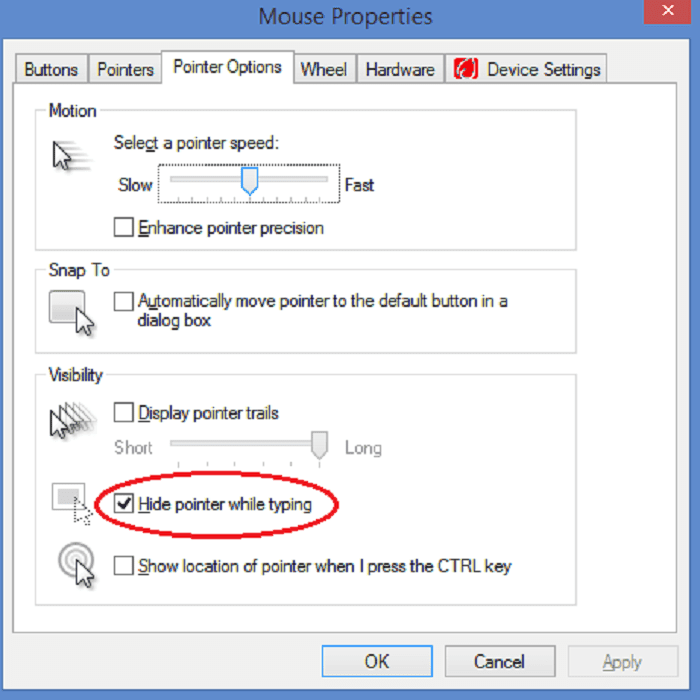
Then see if it helps with the problem or not.
See Also: Windows 10 Very Slow And Unresponsive Problem? [Quick Solutions]
Adjust Your Mouse Pointer Speed
You can fix this problem of the mouse pointer moving on its own by changing the mouse pointer speed. You can follow the steps mentioned below to adjust the mouse pointer speed.
- To open the Run window, click on crucial +R.
- Type the command “main.cpl” into the Run window section
- Now, click on the “Pointer Options” tab in the Mouse Properties Window.
- Then, you can click on the “motion” section to adjust the speed that suits your choice. (Neither too fast, nor too slow)
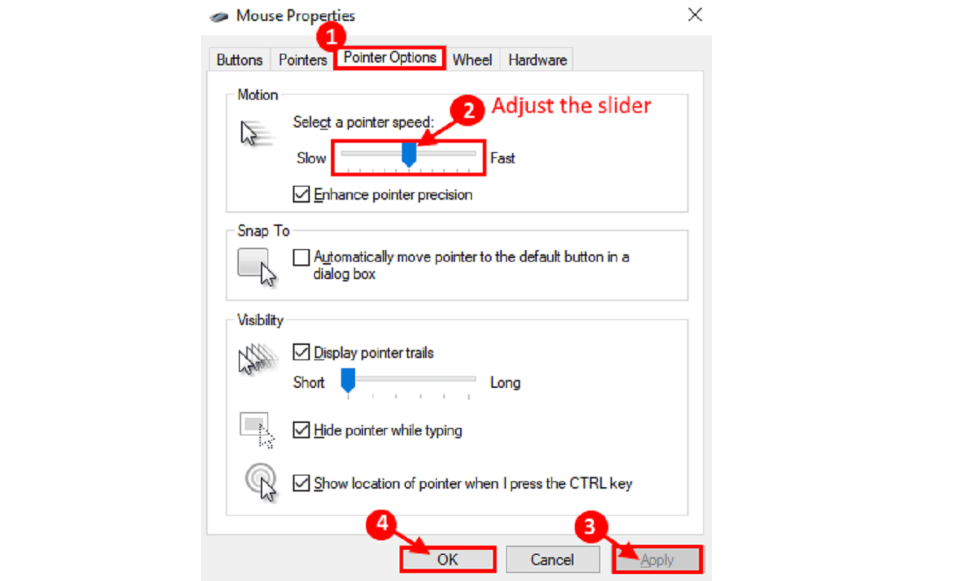
- Click on the “Apply” and the “OK” button to save the changes.
See if the problem persists or is it acceptable.
Update Your Mouse Driver
If the fixes mentioned above don’t work out, try updating your mouse driver.
One of the possibilities is that your mouse driver might be old. You can update the device manager by following the simple steps mentioned below.
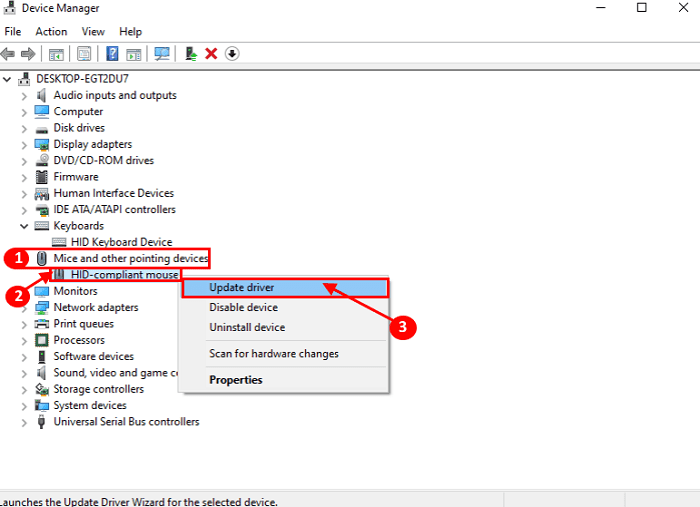
- Press on Key + X to open your Device Manager.
- Click on the option “Device Manager” that will appear on the left side of the screen.
- The next step is to click on the option “Mice and other pointing devices” to expand it.

- Then right-click on the mouse and click on the “Update Driver”.
- Then you have to select the option that says “Search automatically for updated driver software“. Please wait for some time and once the window searches compatible driver for your mouse, download and install it on your computer.
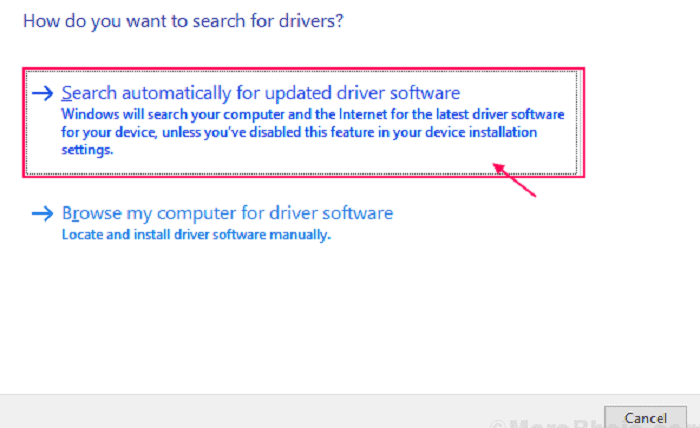
Once you complete this process, a message will pop up. If the message says that “The best driver for your device is already installed”, then you have to click on “Search for updated drivers on Windows Update“. If you want to close the device Manager Window, then press‘Alt+F4‘. Reboot your computer.
See Also: TOP 5 WAYS TO FIX SLOW INTERNET AFTER WINDOWS 10 UPDATE
Run The Hardware Troubleshooter
Though usually, Windows 10 doesn’t have a hardware troubleshooter for a mouse, you can use Command Prompt to access it. Follow the steps mentioned below:-
- Go to the Start menu search bar and search for the command prompt. Then click on Run as administrator.
- On windows 10, the Hardware and Devices troubleshooter will be opened. Type msdt.exe -id DeviceDiagnostic and press Enter.
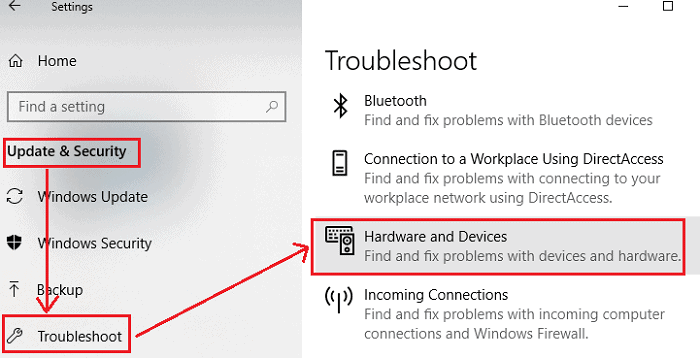
Then click Advanced and press on Apply repairs automatically. Select next, and it’s done.
It’s a pandemic break, and you’re trying to relax by playing your favorite video game or streaming that new movie on Netflix – except your mouse keeps freezing! It might even lag, jump, or disappear entirely. Many users have suffered from this problem, and it can be pretty frustrating to deal with.
Conclusion
By following the ways mentioned above and methods, one can fix the problem of the Mouse moving Automatically quickly. If none of those mentioned above works out, you can contact the experts or professionals.
See Also: Windows 10 Will Not Update with Error Code 0x80240fff

Robert Irvine, How-To Editor at Automaticable, writes tech tutorials since dial-up days. Former editor of Web User magazine, he’s also a cooking enthusiast (not the celebrity chef).