
A corrupt or missing apimswincrtheapl110.dll file is usually the source of Autopsy (64-bit) DLL problems. The majority of these file problems can be fixed by downloading and installing the most recent version of your DLL file. Because the Windows registry may attempt to load a file called apimswincrtheapl110.dll that no longer exists in some situations, we recommend running a registry scan to fix any erroneous file path references.
The Dynamic Link Library format is also known as the DLL file extension system files. You may get a fresh copy of your apimswincrtheapl110.dll for iOS 14.8.1 (and numerous Windows operating systems) in the table below. If the precise version of apimswincrtheapl110.dll you require is not currently available, please request a copy by clicking the “Request” button next to the file version you require. You may need to contact Brian Carrier personally to obtain the exact file version in some unusual circumstances.
Table of Contents
Errors in Apimswincrtheapl110.dll
Autopsy (64-bit) Errors for apimswincrtheapl110.dll:
- “The file Apimswincrtheapl110.dll is missing.”
- “There is a problem with the file apimswincrtheapl110.dll.”
- “Access Violation of Apimswincrtheapl110.dll.”
- “The apimswincrtheapl110.dll could not be found.”
- “C:WindowsSystem32apimswincrtheapl110.dll is missing.”
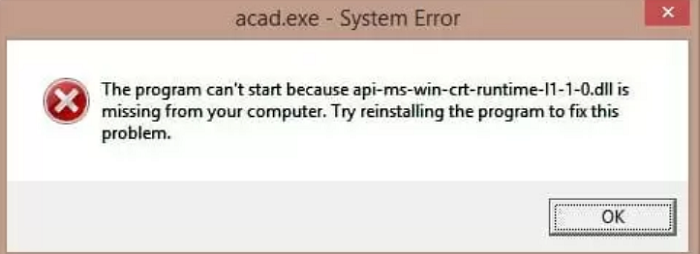
- “Autopsy is unable to begin (64-bit). The component apimswincrtheapl110.dll is missing. Autopsy (64-bit) should be reinstalled.”
- “Because apimswincrtheapl110.dll was not found, Autopsy (64-bit) was unable to start. It’s possible that reinstalling Autopsy (64-bit) will solve the problem.”
apimswincrtheapl110.dll difficulties linked to Autopsy (64-bit) occur during installation, when apimswincrtheapl110.dll-related software is operating, startup/shutdown, or during the Windows installation process.
Would you please keep track of occurrences of the apimswincrtheapl110.dll issue to assist Brian Carrier in troubleshooting Autopsy (64-bit)?
Corrupt (or missing) apimswincrtheapl110.dll file can cause this problem. Autopsy (64-bit) failures are common when using apimswincrtheapl110.dll files as an external resource. Malware, poor shutdowns (OS or Autopsy (64-bit)), and other apimswincrtheapl110.dll-related events can corrupt apimswincrtheapl110.dll files. Autopsy (64-bit) or apimswincrtheapl110.dll error messages are caused by corrupt apimswincrtheapl110.dll files, prohibiting proper loading.
Windows registry entries occasionally cause the apimswincrtheapl110.dll error for Autopsy (64-bit) problems. Autopsy (64-bit) difficulties are caused by broken registry paths with apimswincrtheapl110.dll owing to inappropriate file registration. These faulty file path references can be caused by a lousy Autopsy (64-bit) install/uninstall, a relocated apimswincrtheapl110.dll, or a missing apimswincrtheapl110.dll.
Specifically, a corrupted apimswincrtheapl110.dll registry key can cause apimswincrtheapl110.dll problems. apimswincrtheapl110.dll was tainted and corrupted by malware. apimswincrtheapl110.dll is polluted due to a hardware failure caused by Brian Carrier, such as a graphics card. Another application installation overwrote the correct version of apimswincrtheapl110.dll.
Another software (not Autopsy (64-bit)) maliciously deleted (or mistakenly deleted) apimswincrtheapl110. Unrelated Autopsy (64-bit) application accidentally (or maliciously) uninstalled apimswincrtheapl110.dll.
See Also: FUNIMATION NOT WORKING ON CHROME [FIXED]
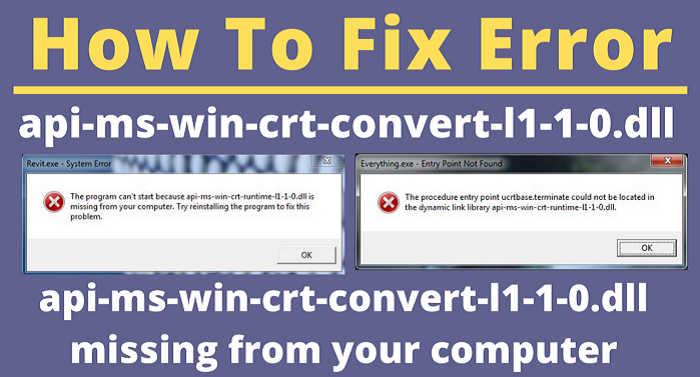
How To Fix Error
A list of troubleshooting steps to fix apimswincrtheapl110.dll issues is provided below. Because these troubleshooting methods become increasingly complex and time-consuming as they proceed, we strongly advise doing them in ascending order to save time and effort.
Using Microsoft Register Server, Manually Register apimswincrtheapl110.dll
From an elevated command prompt, re-register apimswincrtheapl110.dll (Windows XP, Vista, 7, 8, and 10):
- To begin, press the Start button.
- Type “command” in the search box. DO NOT PRESS ENTER JUST YET!
- While holding CTRL-Shift on your keyboard, press ENTER.
- On the screen, a permission dialogue box will display. You should select yes.
- Regsvr32 /u apimswincrtheapl110.dll is the command to use.
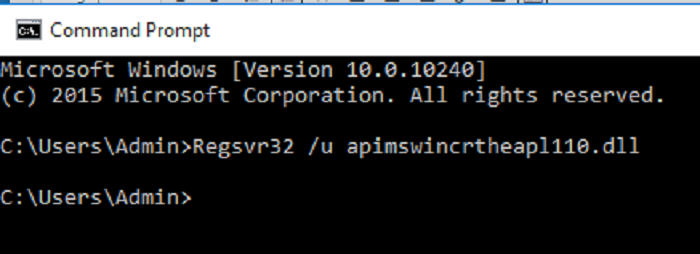
regsvr32 -u apimswincrtheapl110 - Press the ENTER key. Your file will be UN-REGISTERED as a result of this action.
- Regsvr32 /i apimswincrtheapl110.dll is the command to use.
- Press the ENTER key. Your file will be re-registered as a result of this action.
- Close the command prompt window before starting the program giving you the apimswincrtheapl110.dll issue.
Remove Autopsy-Related Registry Entries (64-bit)
Make a backup of your Windows registry by exporting a section of the registry relevant to win32.dll (for example, Windows):
- Press the Start button. Type “command” into the search box… NOW IS NOT THE TIME TO PRESS ENTER!
- Press ENTER while holding CTRL-Shift on your keyboard.
- On the screen, a permission dialogue box will display. It would help if you chose yes.
- A dark box will appear with a flickering cursor. After typing “regedit,” press ENTER.
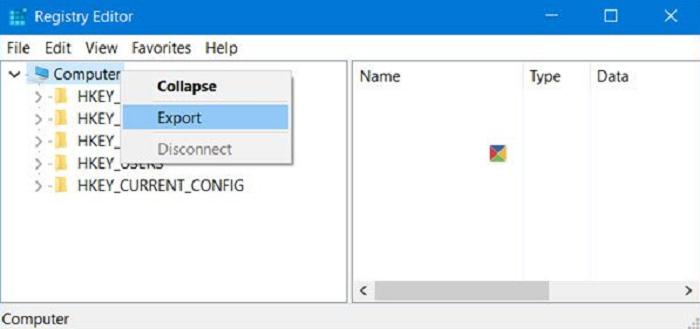
- In the Registry Editor, select the win32.dll-related key (for example, Windows) that you wish to back up.
- From the File menu, choose Export. Now, from the Save In list, choose where you want to save the Windows backup key.
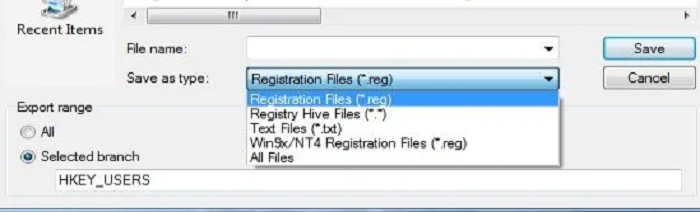
export - Give your backup file a name, such as “Windows Backup,” in the File Name field.
- Save the file. Ensure that you select “Chosen branch” in the Export Range box.
- After that, the file is saved with the .reg extension.
reg - Now you have a backup of the registry entry associated with win32.dll.
Run A Full Malware Scan On Your Computer
Your win32.dll problem may have linked to a malware attack on your computer, and it might damage, corrupt, or delete DLL-related files by these malicious intruders.
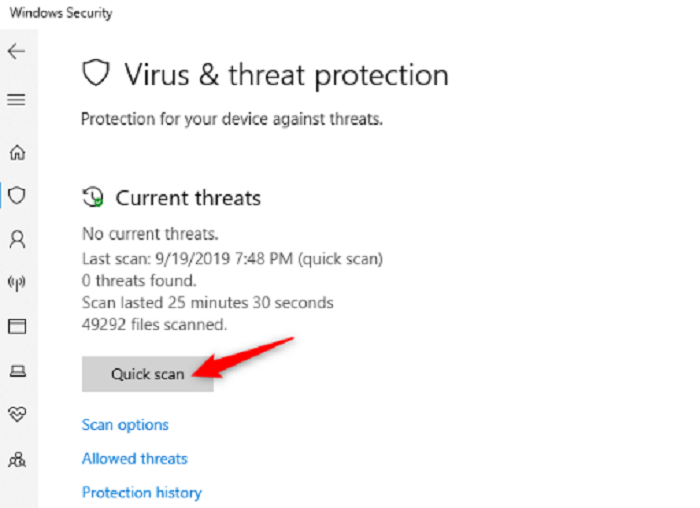
Furthermore, the malicious program itself might be a cause for the win32.dll issue you’re seeing.
Use Disk Cleanup to remove system junk (temporary files and folders)
Disk Cleanup (cleanmgr) on Windows XP, Vista, 7, 8, and 10:
- Start by pressing the Start key.
- In the search box, type “command” NOW IS NOT THE TIME TO PRESS ENTER!
- On your keyboard, press ENTER while holding CTRL-Shift.
- A permission dialogue box will appear on your screen. You have to select YES.
- With a flickering cursor, a black box will pop up.
- Hit ENTER after typing “cleanmgr.”
clean mgr cmd - Disk Cleanup will start calculating how much disc space you can free up.
- A series of checkboxes will appear in the Disk Cleanup dialogue box, from which you can choose. The “Temporary Files” category takes up the most disc space in most circumstances.
- Click OK after checking the boxes next to the categories you want to clear.
Make sure your PC’s device drivers are up to date
Corrupt or obsolete device drivers might cause win32.dll errors. For various reasons, drivers may work one day and then quit working the next. You can fix the DLL problem by updating the device driver. Even on the Microsoft or associated manufacturer’s websites, finding the exact driver for your win32.dll-connected hardware device can be challenging.
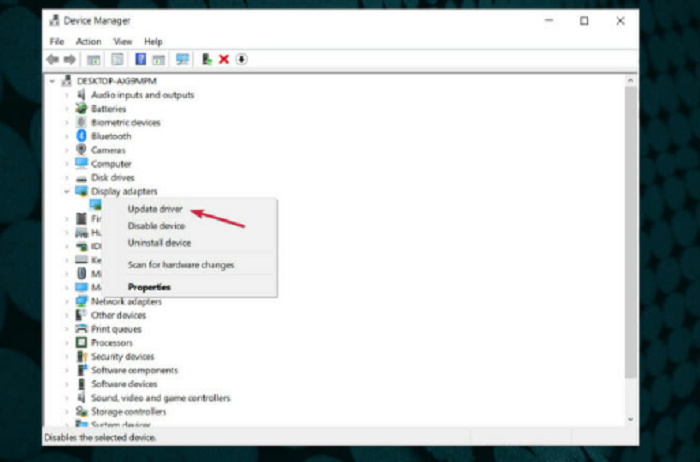
Even if you’re a seasoned pro at finding, downloading, and manually upgrading drivers, the process may be tedious and time-consuming. Installing the incorrect driver or just an incompatible version of the correct driver can exacerbate your issues.
Use Windows System Restore to undo recent system modifications
To use System Restore on Windows XP, Vista, 7, 8, or 10, follow these steps:
- Start by pressing the Start key.
- Type “System Restore” in the search bar and press ENTER.
- Select System Restore from the drop-down menu.
- Enter Passwords for administrators (if prompted).
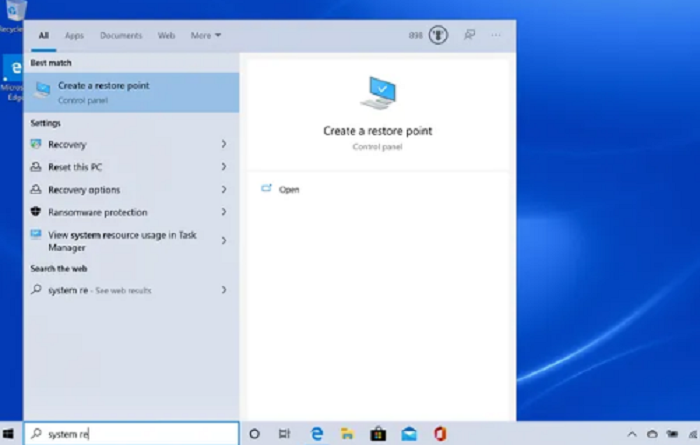
system restore - To select a restoration point, go through the Wizard’s procedures.
- It would help if you restore your PC.
Uninstall and reinstall the Autopsy (64-bit) program linked to apimswincrtheapl110.dll
For Windows XP, follow these steps:
- By pressing the Start button, go to Programs and Features.
- Control Panel will appear when you click it.
- Add or remove programs by clicking the Add or Remove Programs button.
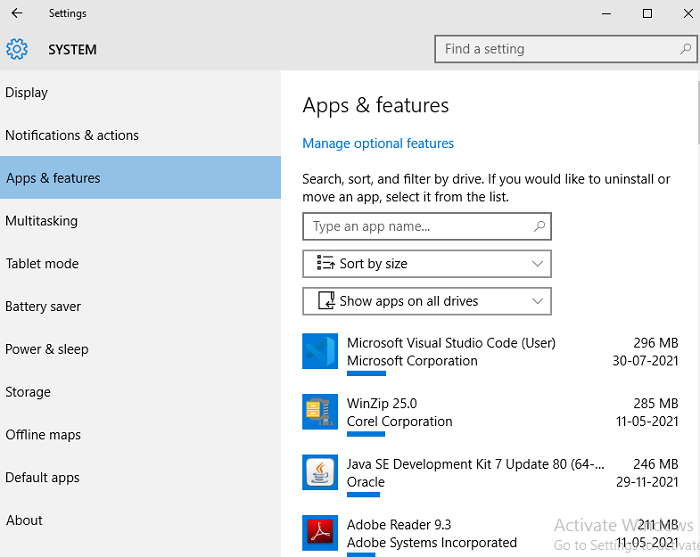
add or remove programs - Under the list of Currently Installed Programs, look for the win32.dll-related program (for example, Windows).
- Select the Windows-related option.
- On the right, click the Remove button.
- To uninstall your win32.dll-related program, follow the on-screen instructions.
Run System File Checker (“sfc /scannow”) on Windows
- Start by pressing the Start key. In the search box, type “command” NOW IS NOT THE TIME TO PRESS ENTER!
- On your keyboard, press ENTER while holding CTRL-Shift.
- A permission dialogue box will appear on your screen. Select Yes.
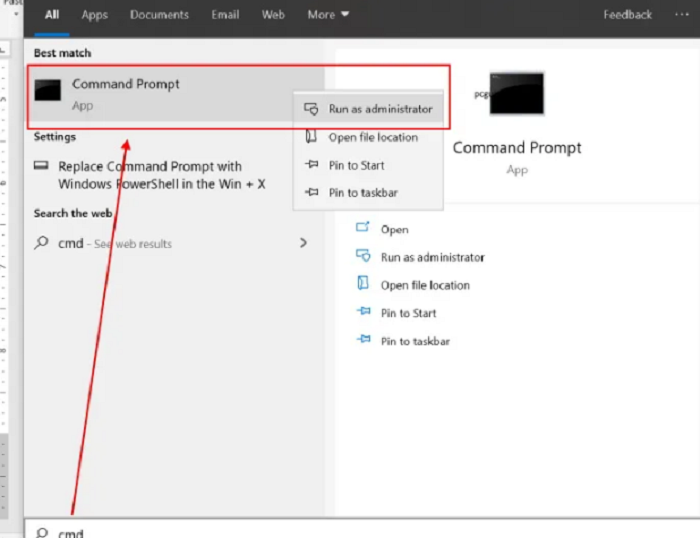
cmd run as administrator - With a flickering cursor, a black box will pop up.
- Hit ENTER after typing “sfc /scannow.”
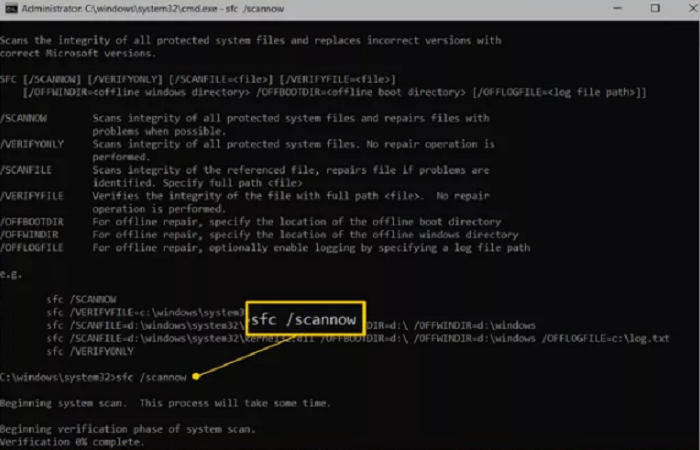
sfc scanner - System File Checker will start looking for issues with win32.dll and other system files (the system scan may take a while).
- Read the instructions carefully.
Make Sure You Have All of The Latest Windows Updates Installed
Microsoft updates and improves Windows system files linked to win32.dll regularly. It may be as simple as updating Windows with the newest Service Pack or another patch that Microsoft regularly publishes to fix your DLL problems. For checking Windows updates available (Windows XP, Vista, 7, 8, and 10):
- To begin, press the Windows key.
- In the search bar, type “update” and press ENTER.
- A dialogue box for Windows Update will display.
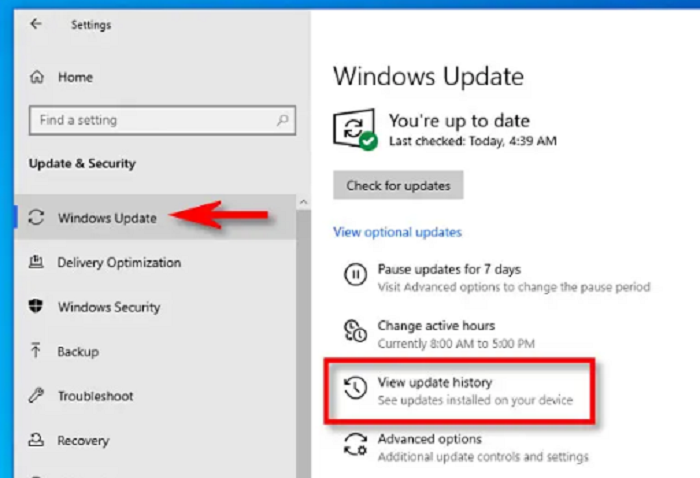
windows update - Click the Install Updates button if updates are available.
Conclusion
Install Windows From The Ground Up –This is your final option for resolving your win32.dll problem. When you reinstall Windows, everything on your hard drive is erased, allowing you to start with a clean slate. Furthermore, a fresh install of Windows will swiftly clear out any “junk” that has accumulated throughout your computer’s usual operation. In this article, there are listed causes of apimswincrtheapl110.dll Not Found error and methods to solve the same. I hope it helps you to resolve your problem.
See Also: How To Fix “Browser keeps opening by itself on Android”

Tony, computing writer at Automaticable, covers laptops, tablets, Windows, iOS. Off-duty, he indulges in comics, gaming, speculative fiction, and excessive Twitter use. Non-nerdy side includes rocking out at concerts and hitting NYC bars.